I. Intro
Date: 04/05/2023
During the first lab, we trained AI to identify the objects on the ground and let it calculate the area displaced on the surface.
Part 1: Extract Spectral Bands
II. Extract Spectral Bands
- Create a new project and load the database into ArcGIS Pro.
- Drag the layer into contents pane.
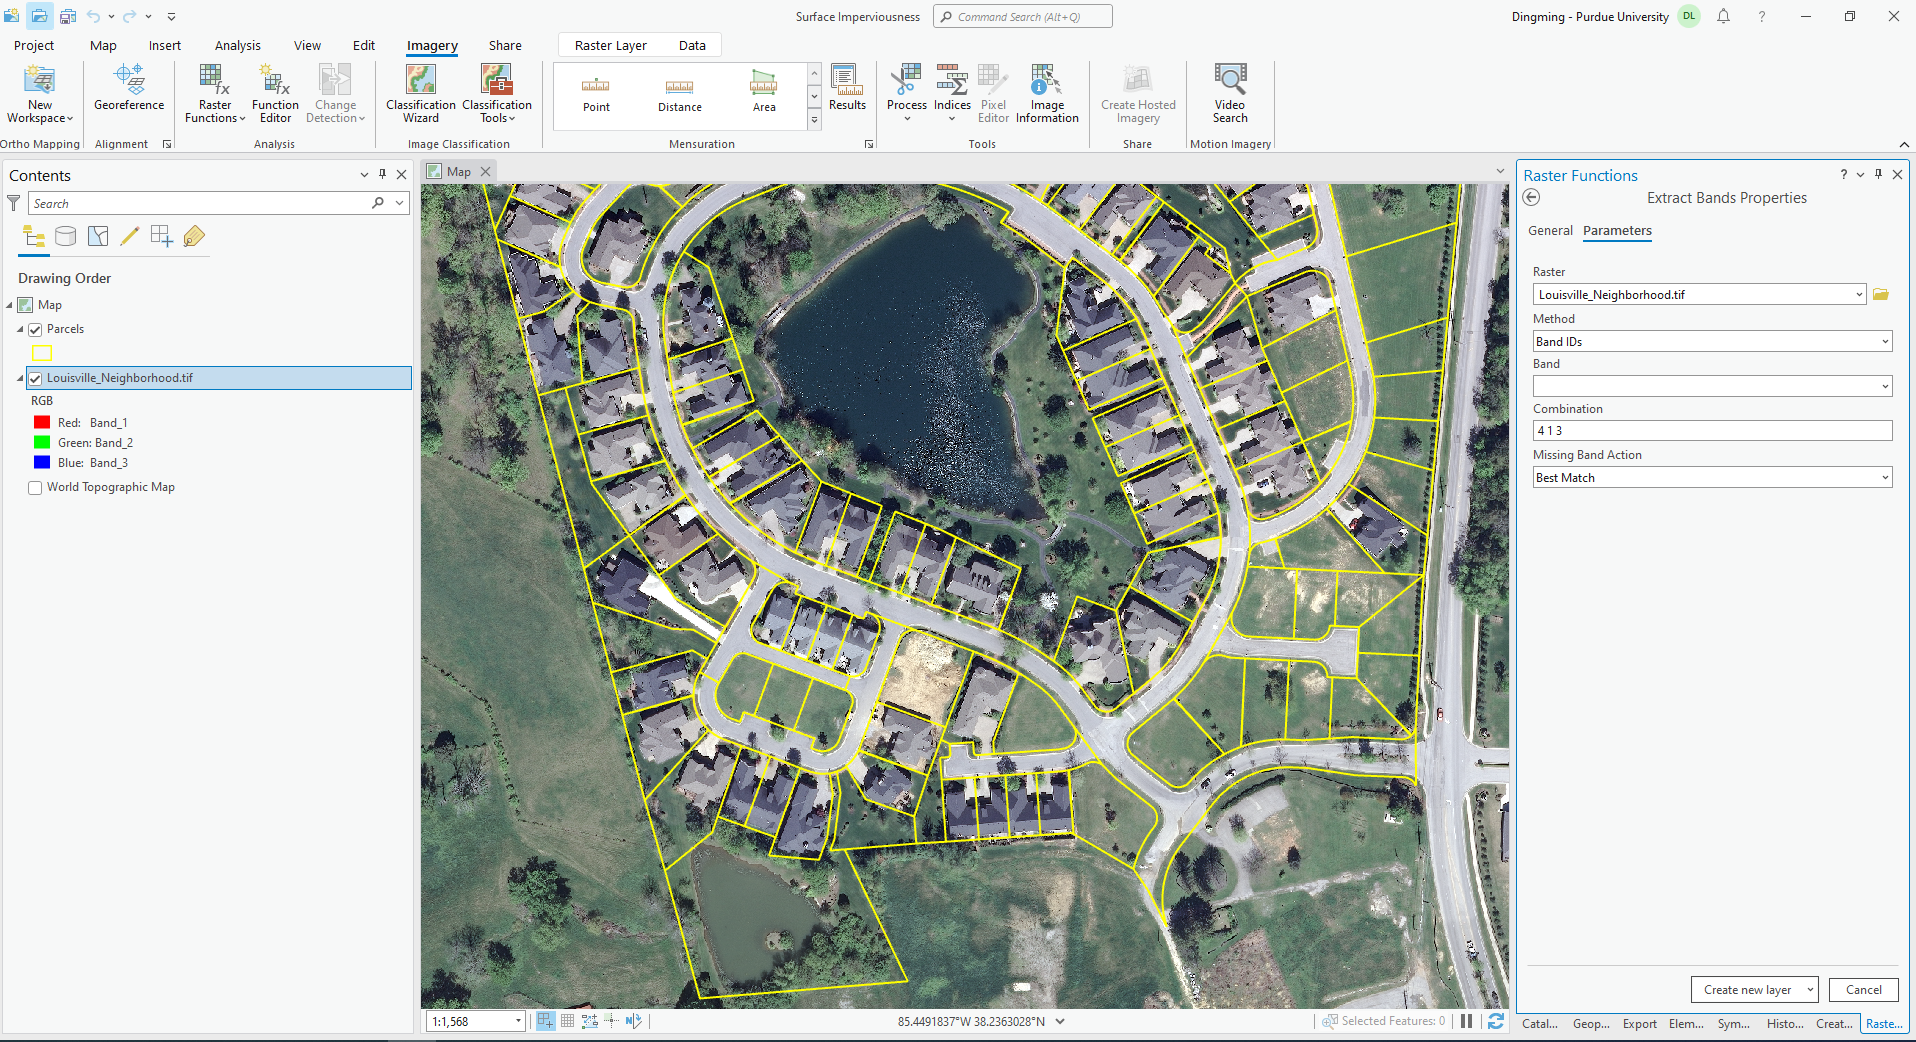
- Select the layer, click Imagery in the tab -> Raster Function (in the Analysis section)
- Search for “Extract Bands” and open it.
- Set the “Raster” to the layer you chose, set the method to Band IDs.
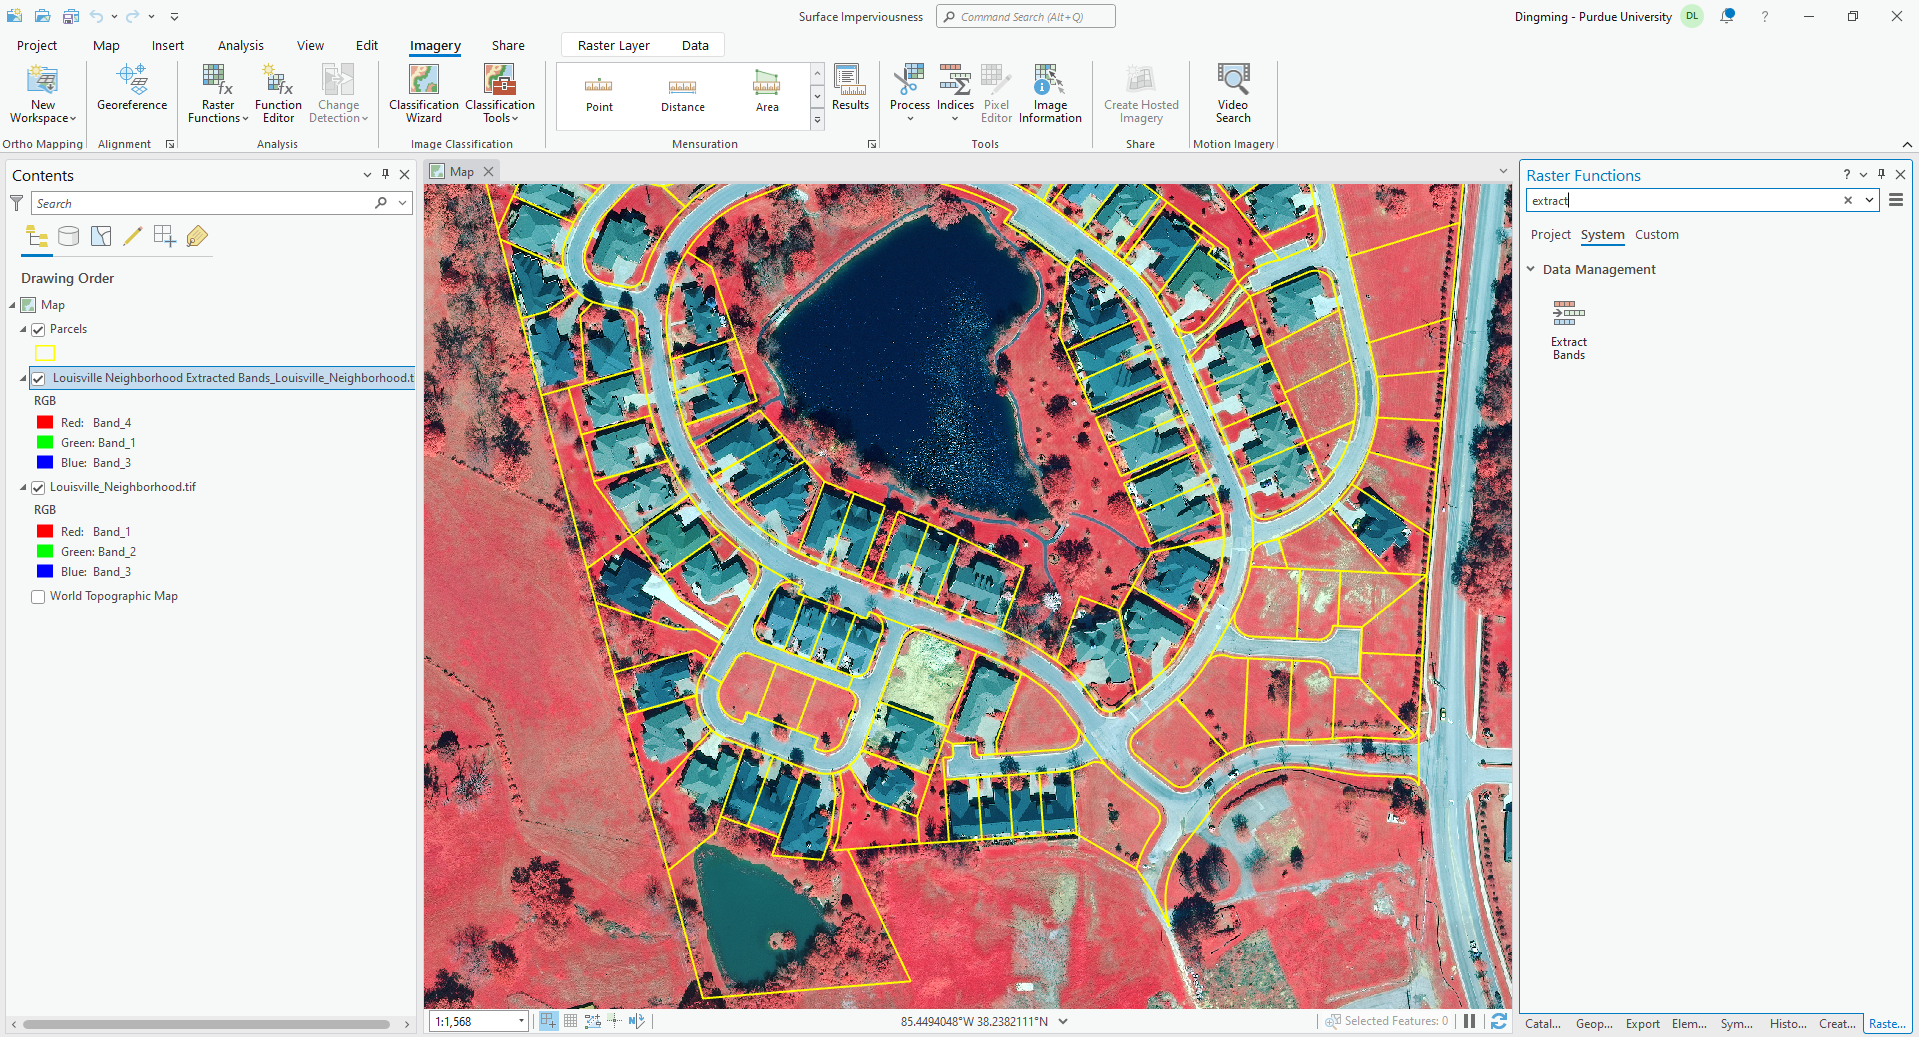
- Set the combination to “4 1 3”, so red color is showing NIR, green color is showing red, blue color is showing blue.
- Set the missing Band Action to Best Match.
- Rename the new layer, and create it.
Part 2: Classification
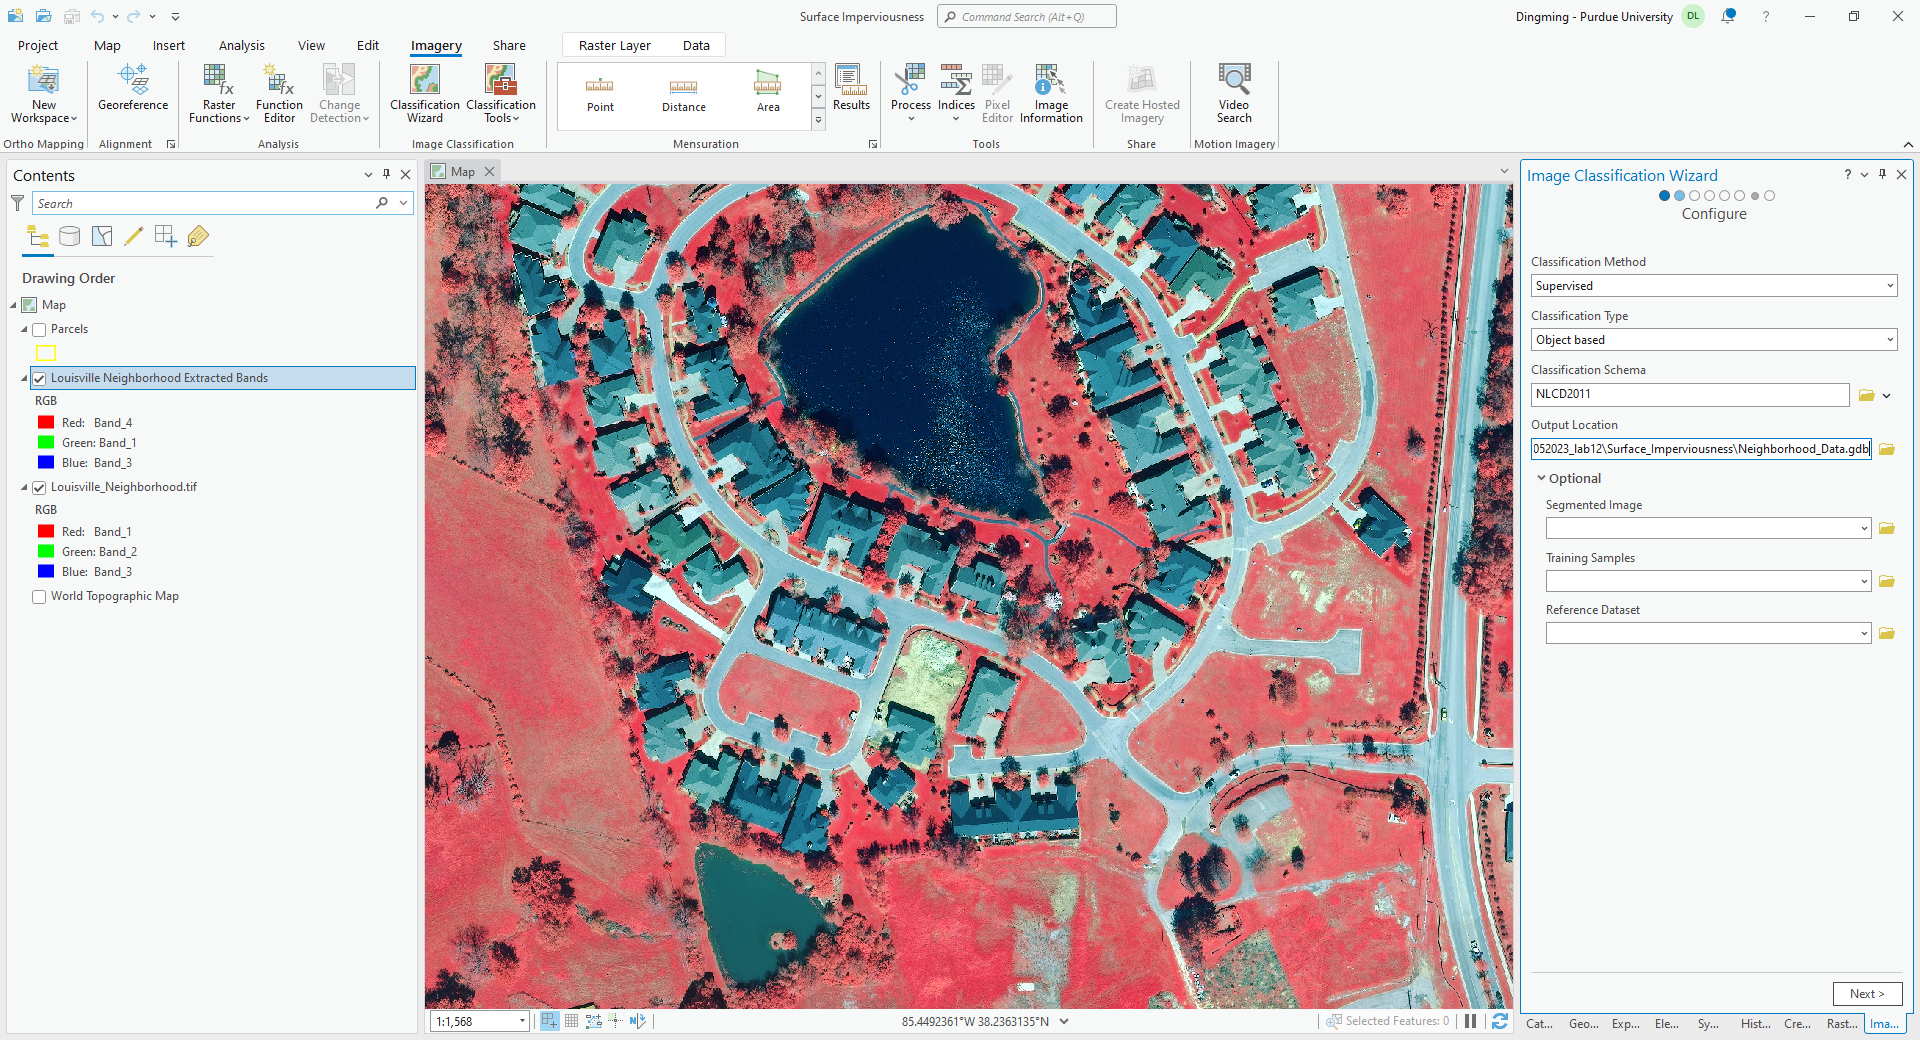
III. Configure
Select the extracted band, click imagery in the tab, and click Classification Wizard
- Set the “Classification Method” to Supervised.
- Set the “Classification Type” to Object based
- Set the “Classification Schema” to Use default schema
- Rename the output
- Next
IV. Segmentation
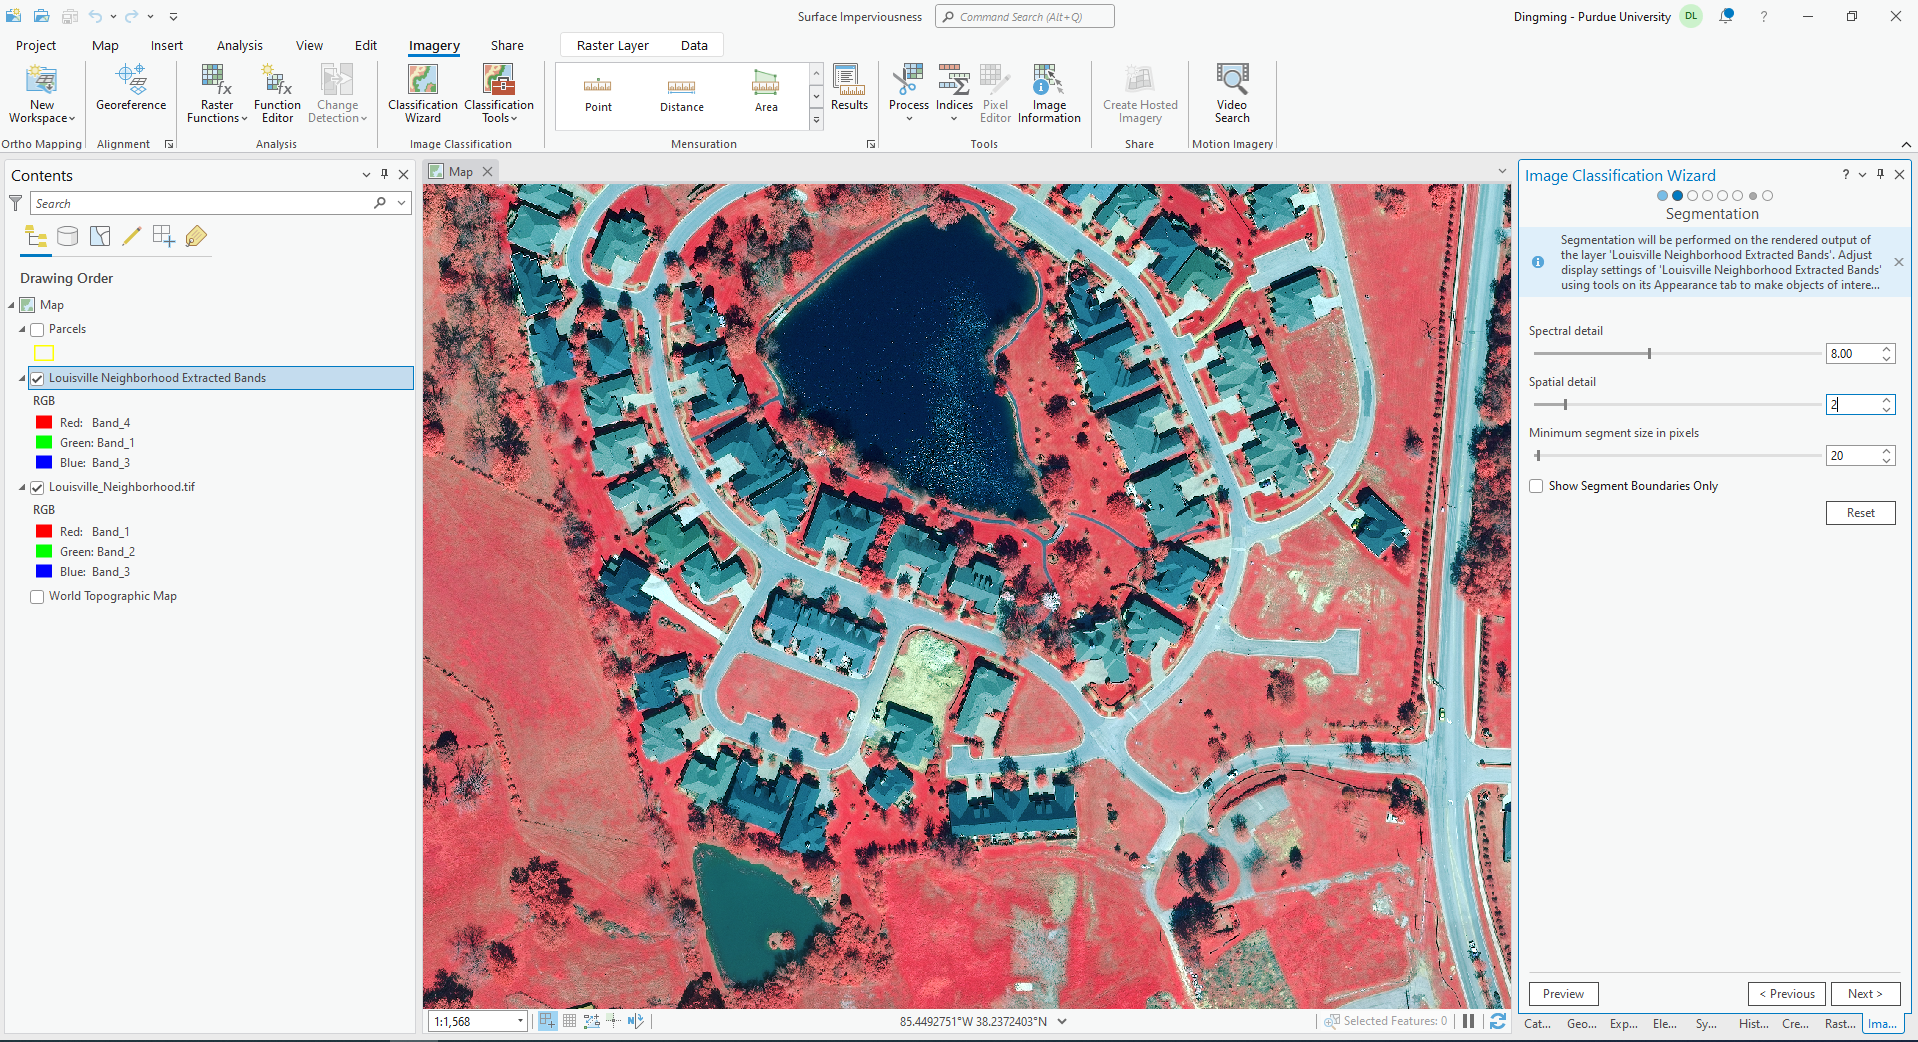
- Set the “Spectral detail” to 8. Higher value will let more similar pixels to be grouped together.
- Set the “Spatial detail” to 2. Higher value will let closer pixels to be grouped together.
- Set “Minimum segment size in pixels” to 20. If a group of pixels is less than this value, that groups will be merged to its neighbor.
- Uncheck “Show Segment Boundaries Only”
- Next
V. Training Samples Manager
- 1. Delete the default settings by right click the class and “Remove Class”
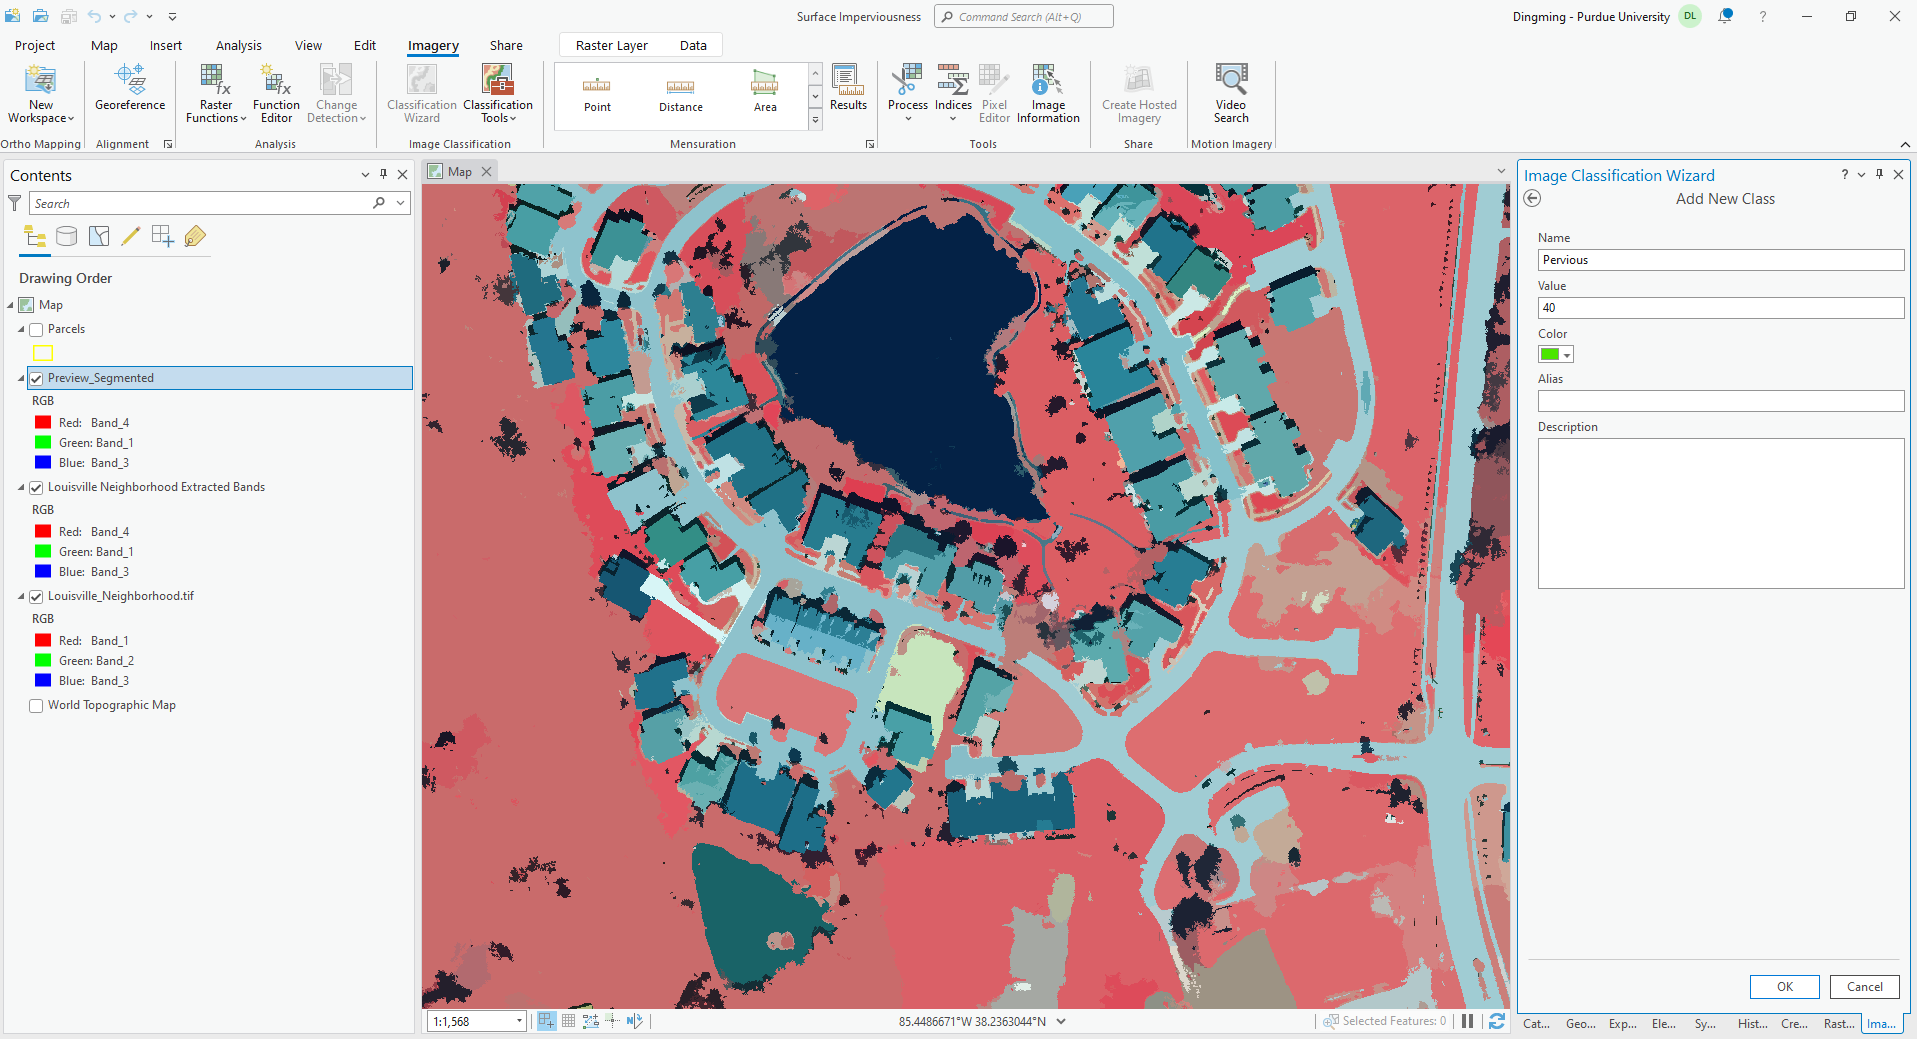
- Right click the top category (right above the first class just deleted), “Add New Class”. It can be a main category or a sub category. Name it, give it a value which is just like a part number/model number, and set a color.
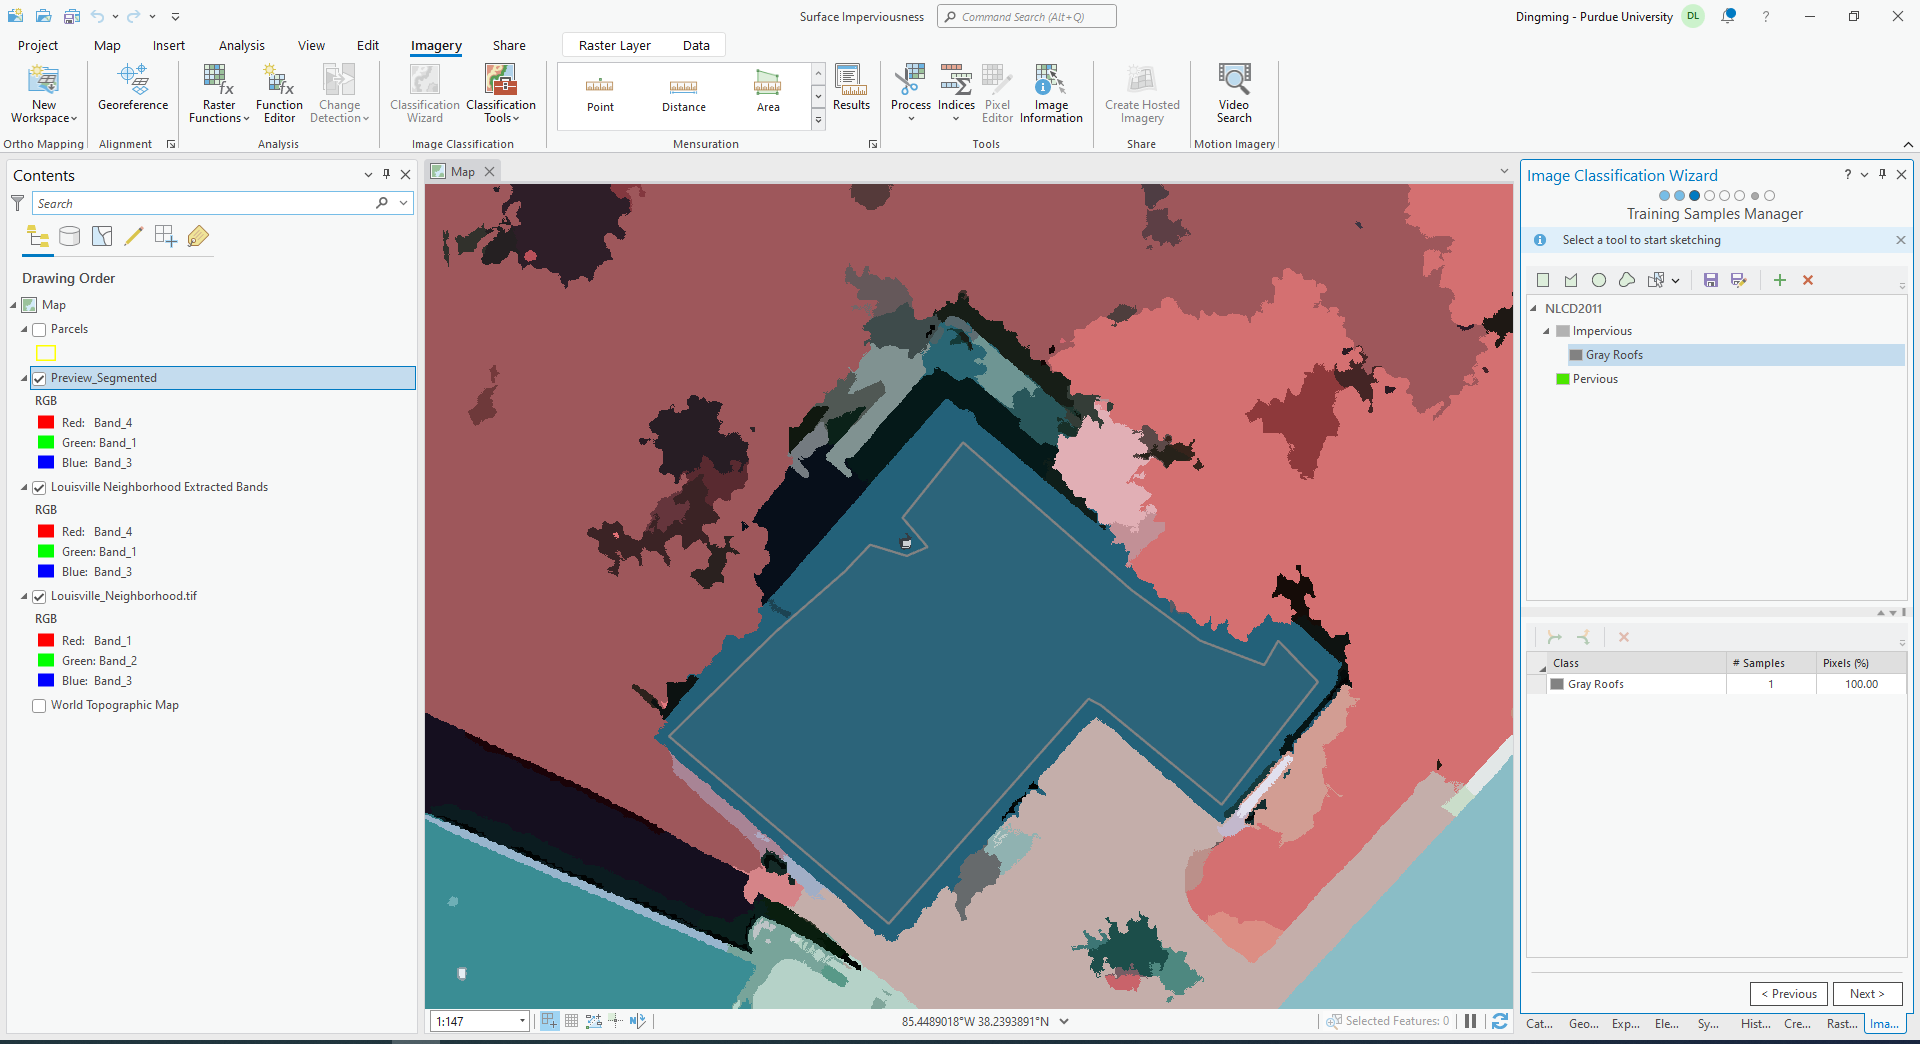
- If a main category is created in step 2, you can still right click it and create subcategories under it. Same procedure as step 2. For example, in this step, a layer “Water” is created
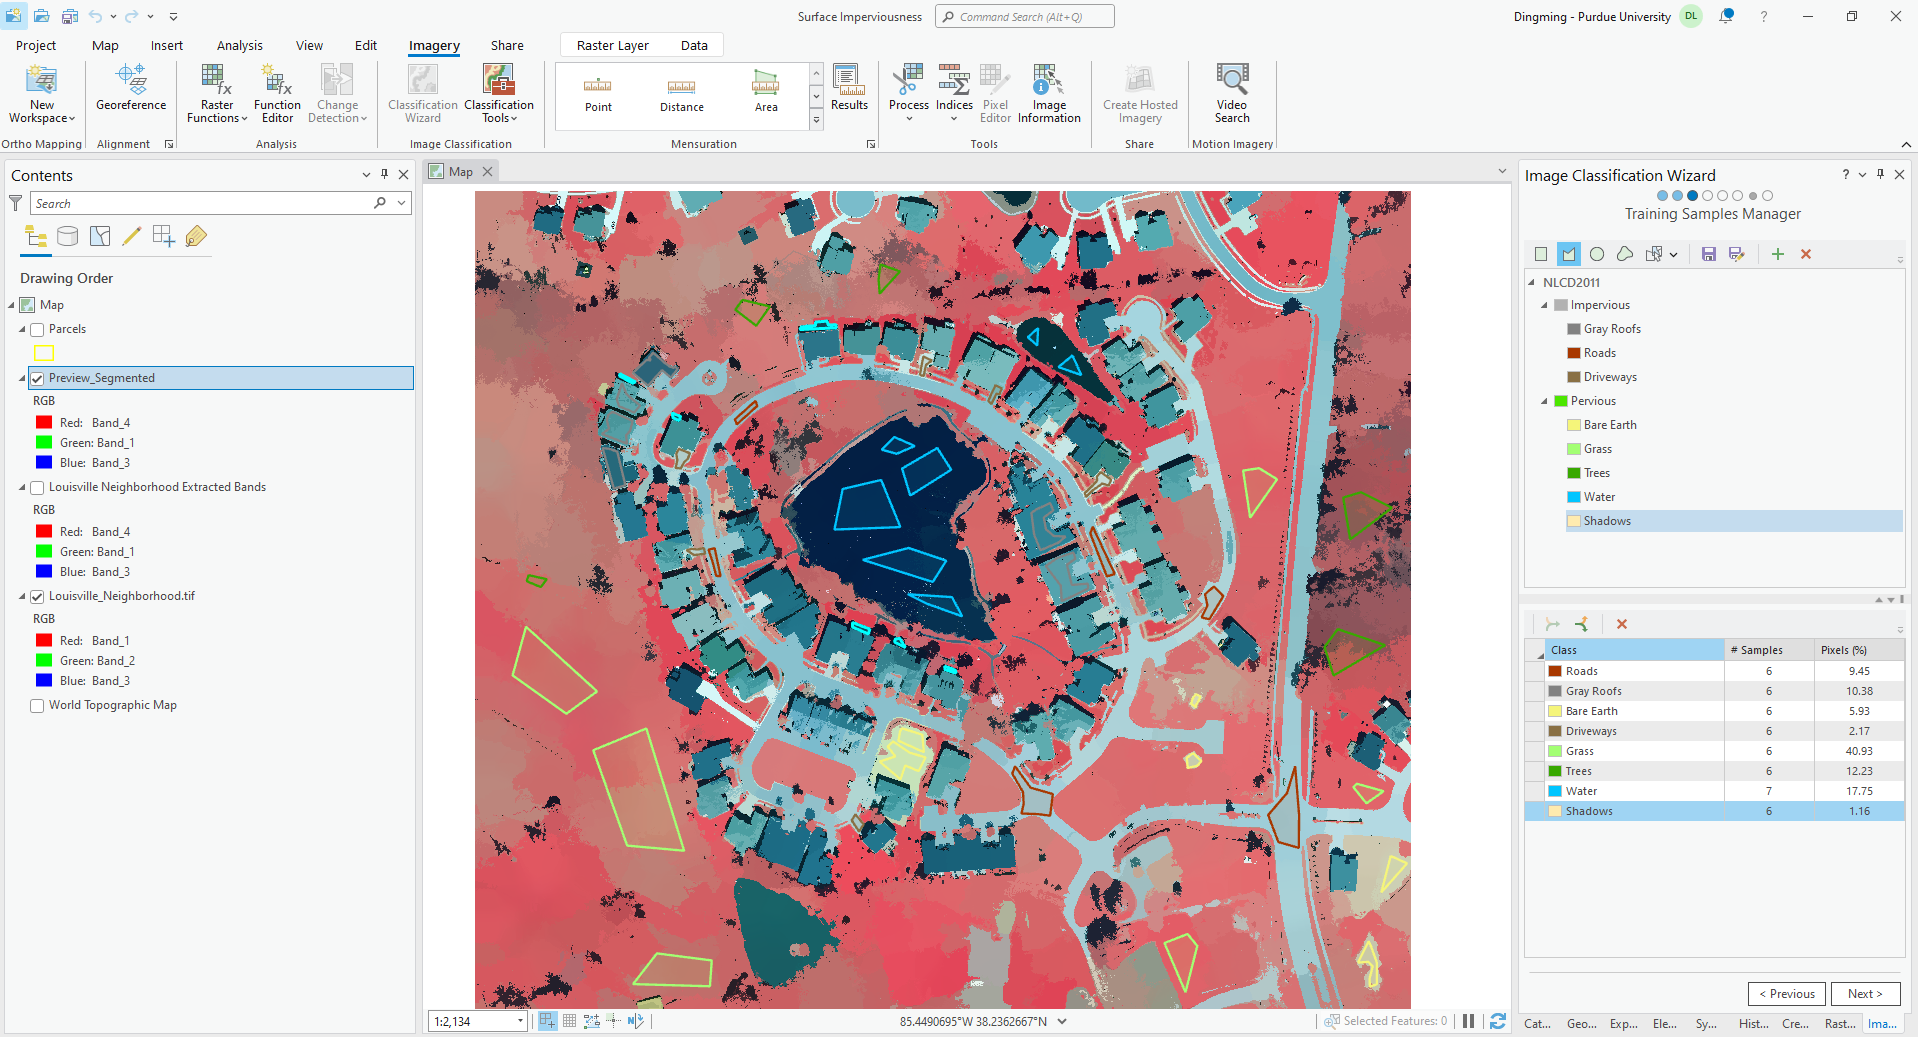
- Click “Water” class, zoom to water on the “Preview_Segmented” map, click the polygon tool, draw polygon over the pixels that only have water. Do it several times in different locations. Double click to finish the polygon.
- Select the samples with same class, and “Collapse” them together.
- Do the same thing on other class and objects.
- Next
VI. Train
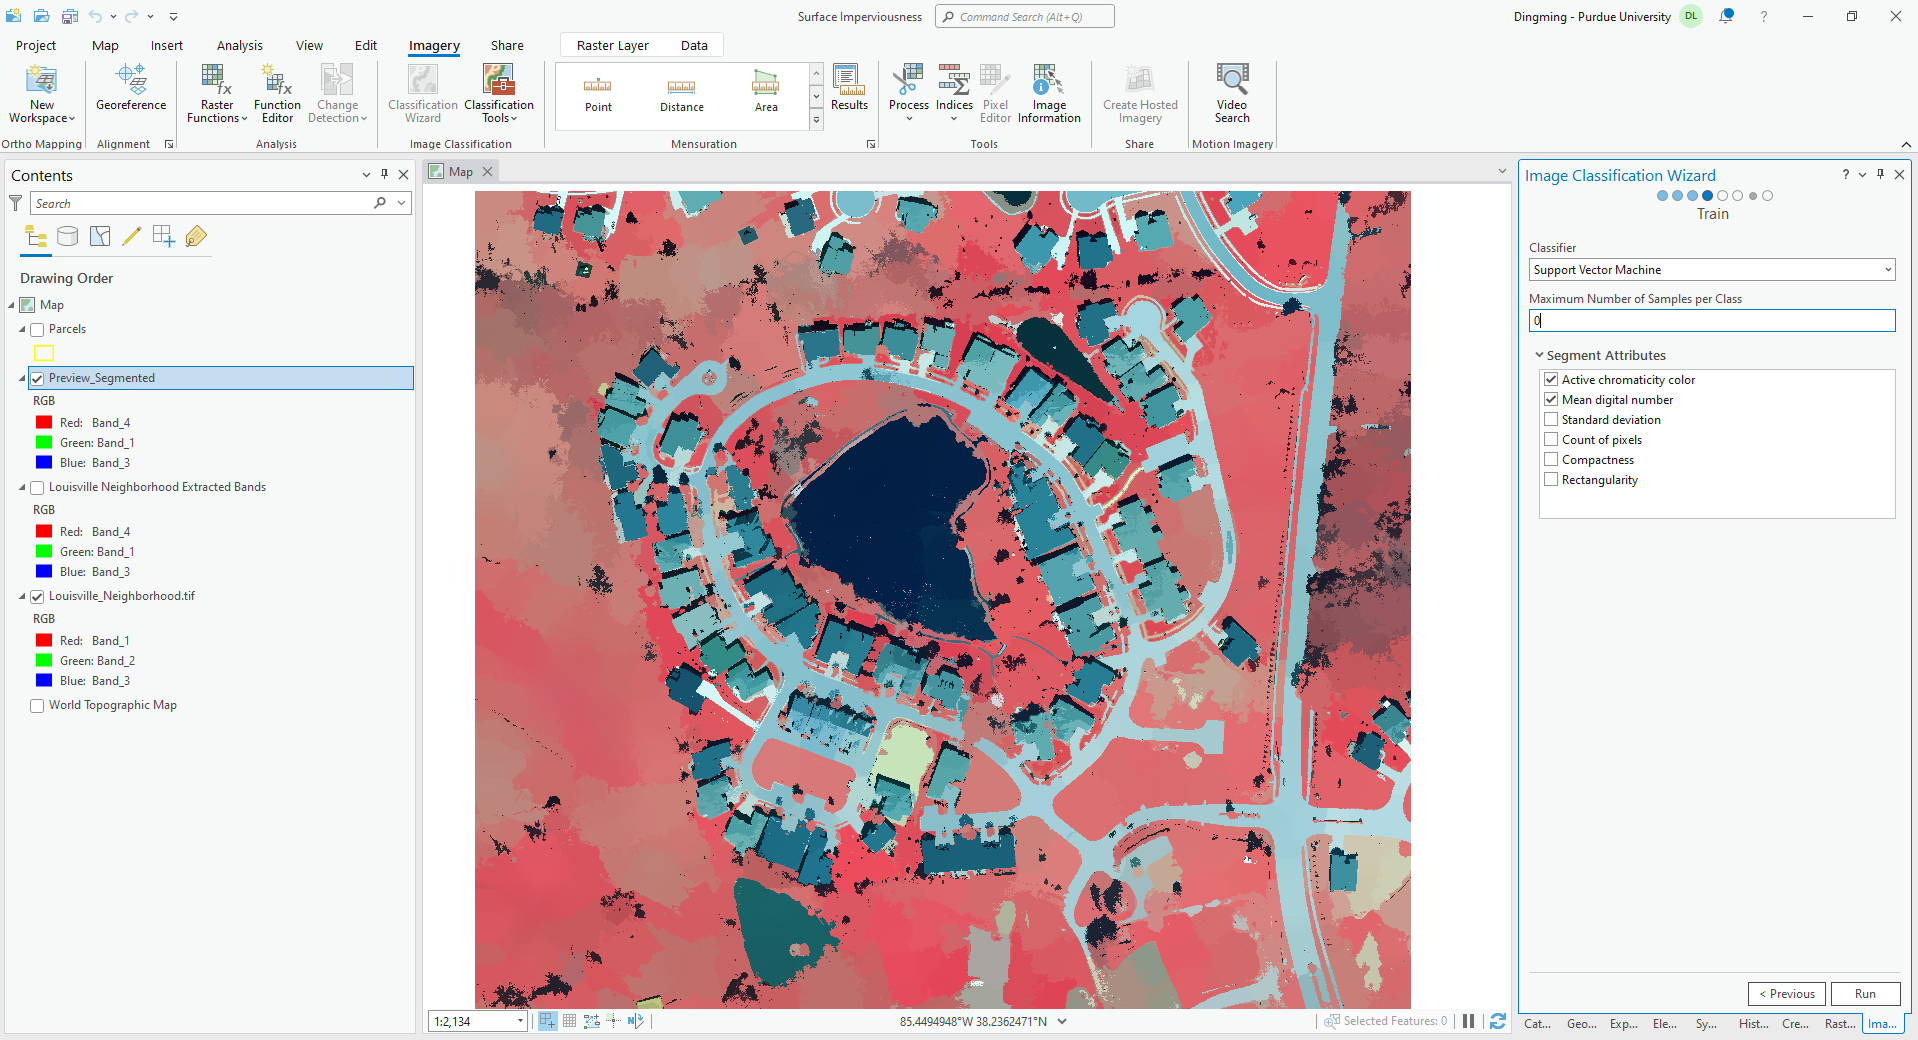
- Set the “Classifier” to Support Vector Machine. This can handle large images and it’s less susceptible to discrepancies in training samples.
- Set the “Maximum Number of Samples per Class” to 0. Maximum number of samples to use for defining each class. If want to use all samples, set it to 0.
- Run
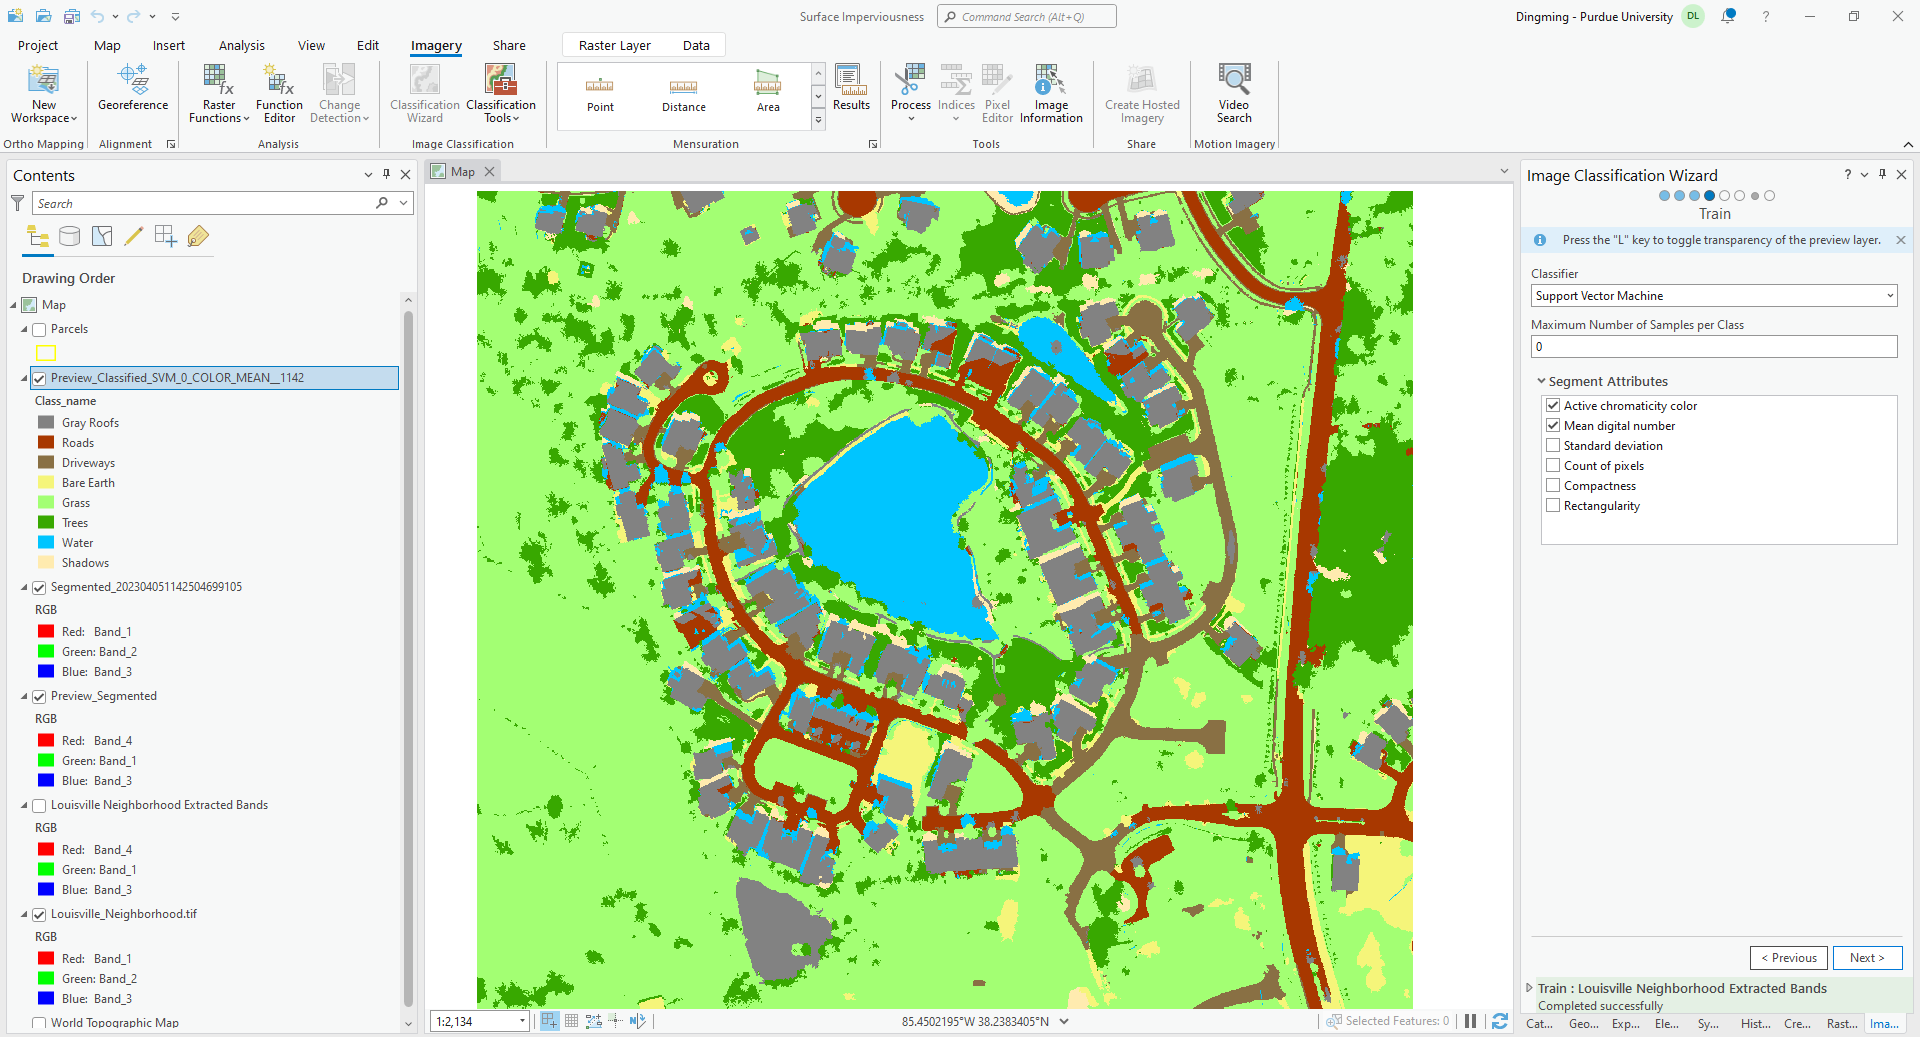
VII. Merge Classes
You can choose to merge the old class (on the left) to new class (right). New class is either itself or its higher category.
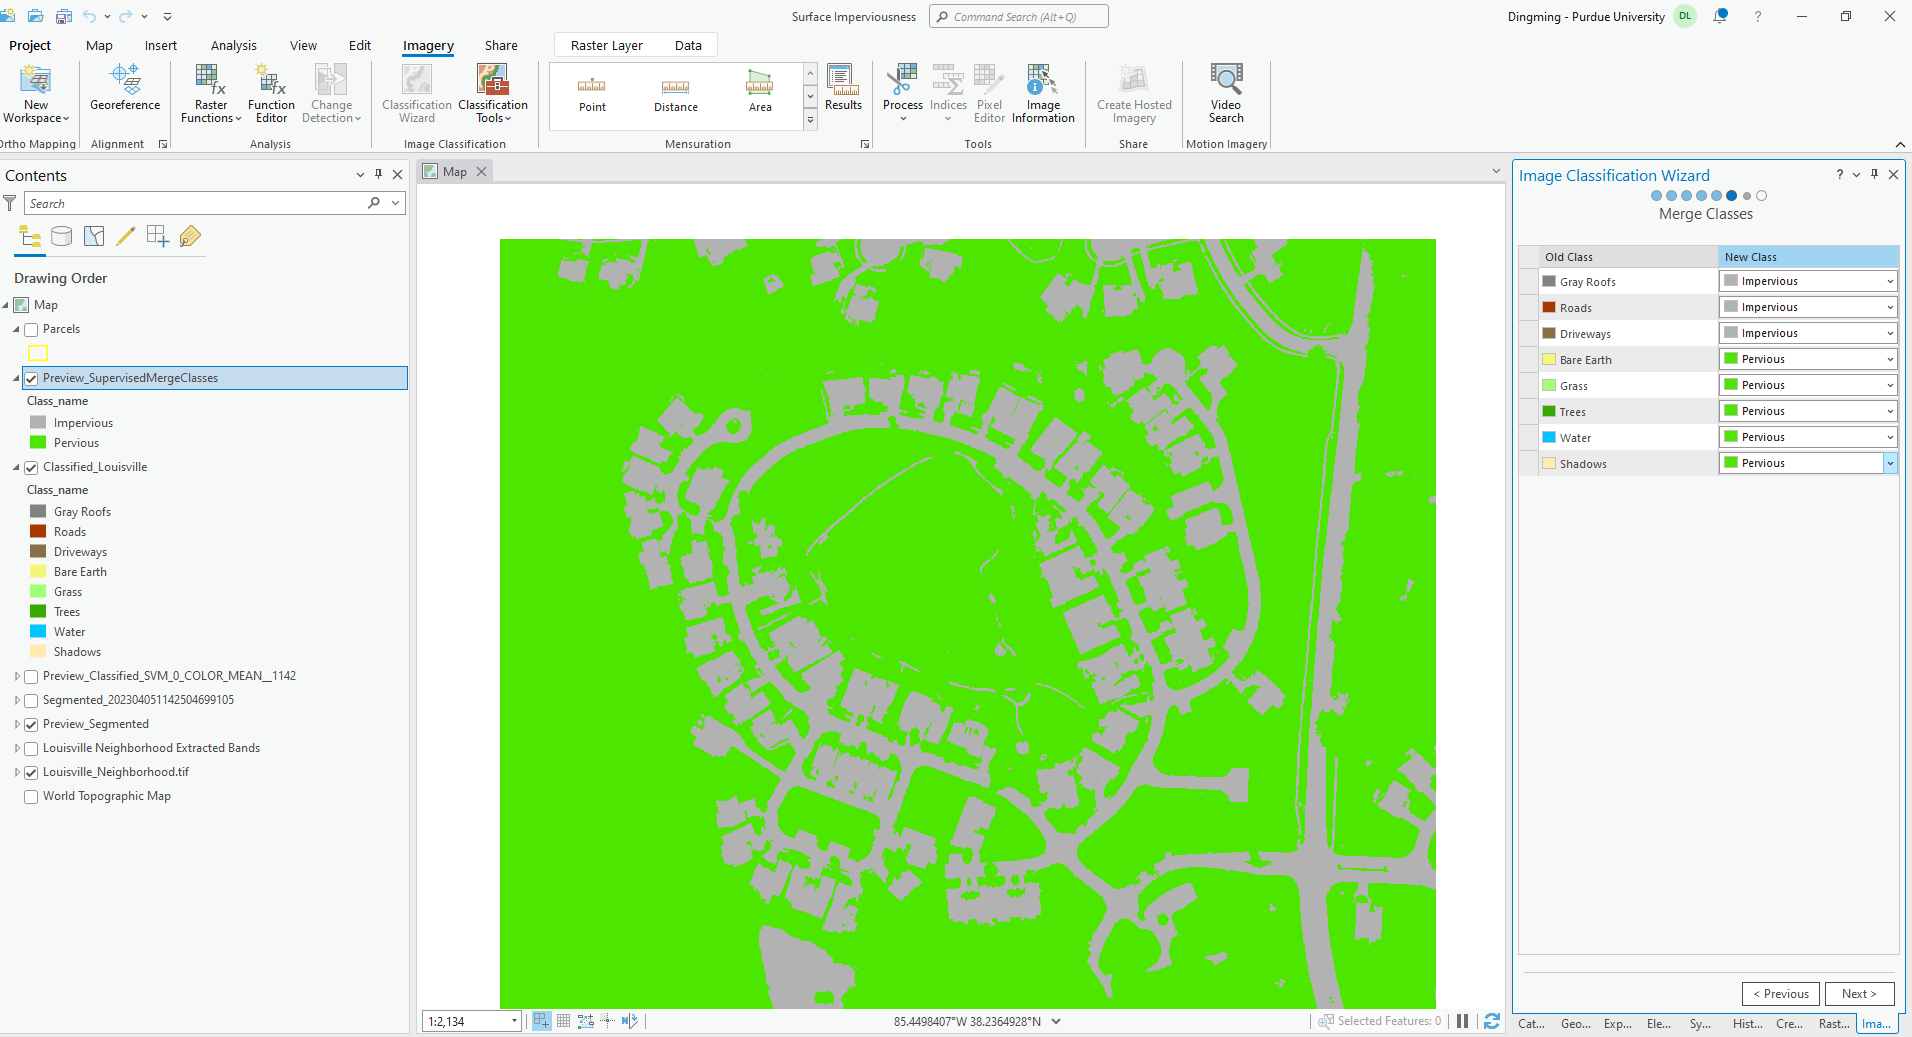
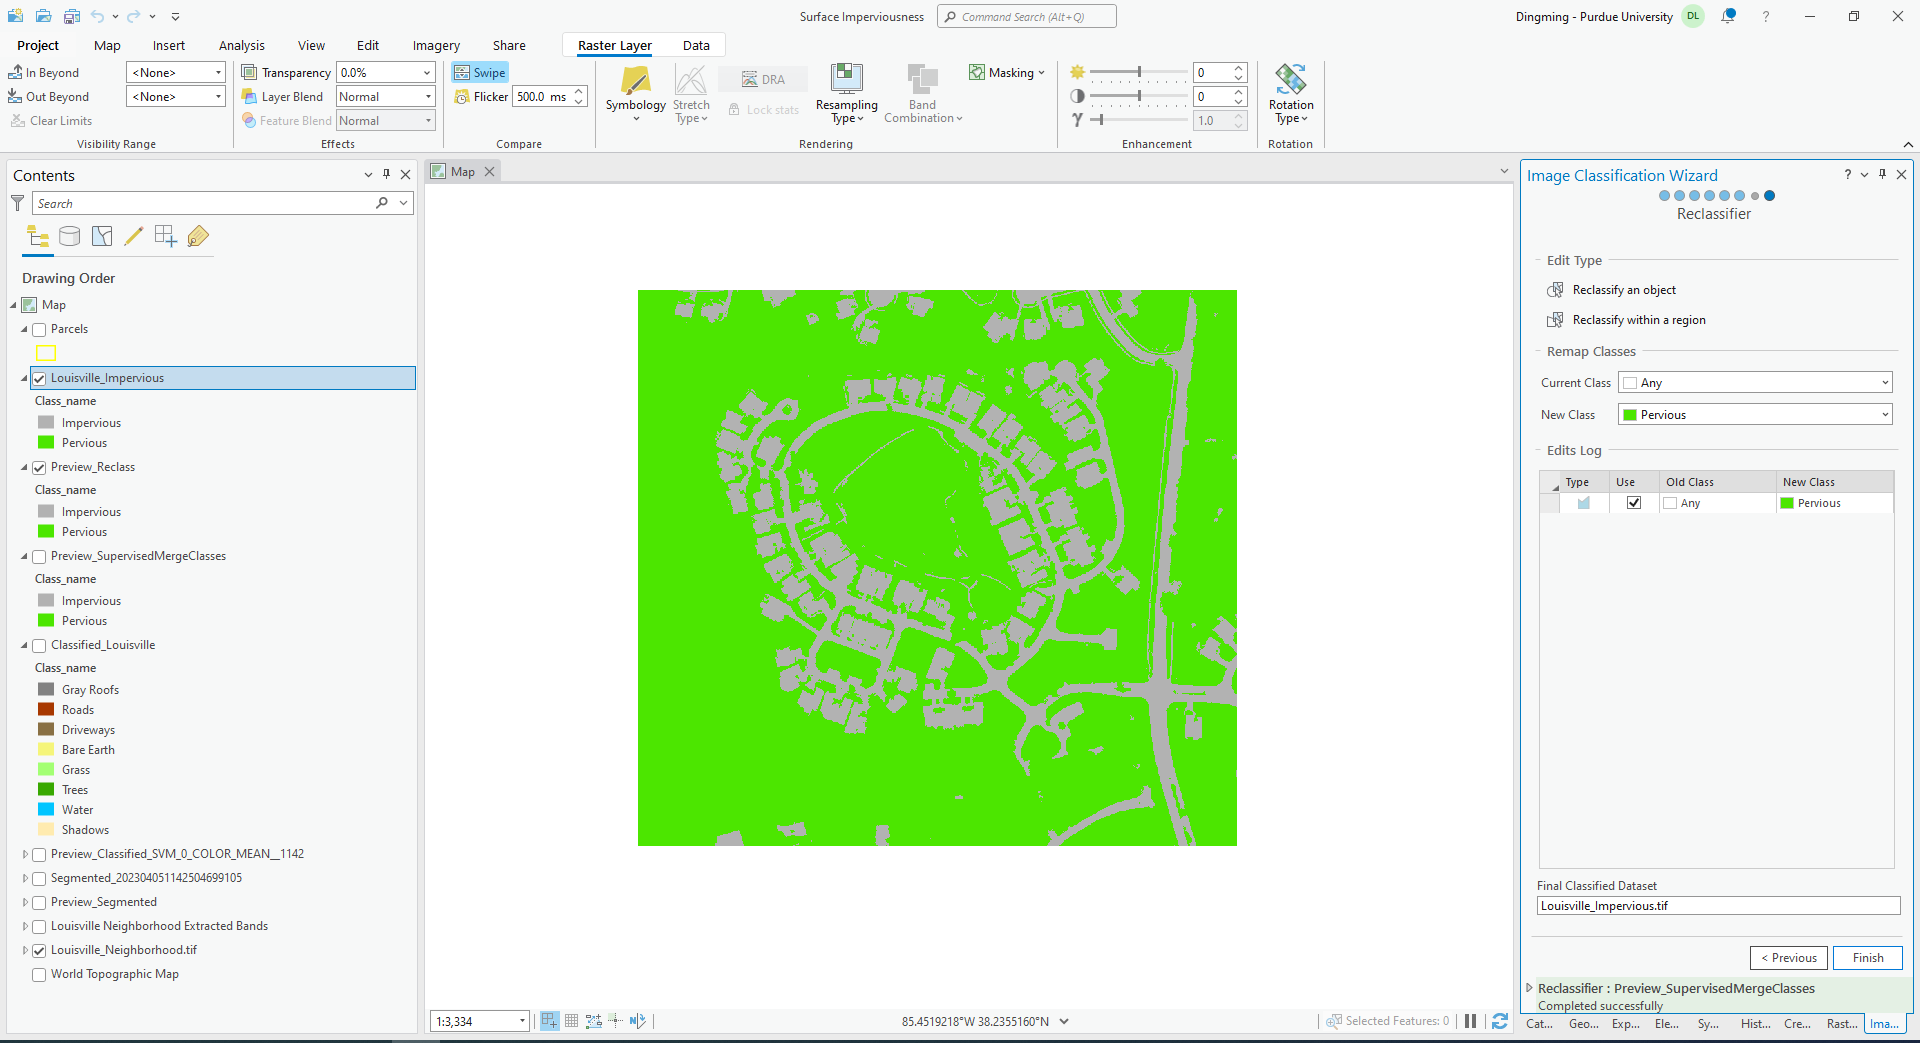
VIII. Reclassifier
- Check and uncheck the layers so the newest merged layer and the initial RGB layer are checked, all else are unchecked.
- Click Preview_Reclass, click “Raster Layer” tab, and click Swipe in the Compare section.
- Drag the line to see the difference and inconsistency between two layers.
- If there’s any error, click “Reclassify within a region” in the ‘Reclassifier, set the New class to which the object belongs to, and draw polygons around it.
- Run, and Finish.
